Are you a parent or guardian of a child with asthma? Ensuring that your child has the necessary accessories at school is essential for their safety and well-being. In this article, we will explore the recommended asthma accessories for school, providing you with valuable information on how to best support your child’s respiratory health while they are away from home. From inhalers to spacers, we will cover everything you need to know to ensure your child can breathe easy throughout their school day.
Asthma Action Plan
Creating an Asthma Action Plan
Having an asthma action plan is essential for students with asthma as it helps them manage their condition effectively. An asthma action plan is a written document that outlines the steps to be taken in case of an asthma attack or worsening symptoms. To create an asthma action plan, start by consulting with your child’s healthcare provider, school nurse, or asthma educator. They can provide guidance on tailoring the plan to your child’s specific needs.
The asthma action plan should include the following information:
-
Personal information: Include your child’s name, date of birth, emergency contact information, and the names and contact information of their healthcare providers.
-
Emergency contact information: Provide the names and phone numbers of people to contact in case of an emergency, such as parents, guardians, and healthcare providers. It’s important to keep this information up to date.
-
Medication instructions: Clearly list the medications your child needs to take, including their dosage, frequency, and any special instructions. This will help ensure that your child receives the correct medication at the right time.
-
Asthma triggers: Identify common triggers that may worsen your child’s asthma symptoms, such as allergens, exercise, or exposure to smoke. Include strategies for avoiding or minimizing exposure to these triggers.
-
Early warning signs: Describe the early warning signs or symptoms that indicate your child’s asthma may be worsening. This can include coughing, wheezing, shortness of breath, or chest tightness. By recognizing these signs early on, you can take preventive measures or administer medication as necessary.
-
Emergency procedures: Provide step-by-step instructions on what to do in case of an asthma attack or severe symptoms. This can include using a rescue inhaler, administering additional medication, or seeking immediate medical attention.
-
Contact information: Include the names and phone numbers of school staff who should be notified in case of an asthma emergency. This can include the school nurse, teachers, coaches, and administrators.
Remember to regularly review and update the asthma action plan as needed. It’s important to share the plan with your child’s school, teachers, coaches, and anyone else who may need to be aware of your child’s asthma management.
Implementing the Asthma Action Plan
Once you have created an asthma action plan, the next step is to implement it effectively. Here are some key steps to ensure the plan is followed and your child’s asthma is well-managed at school:
-
Communicate with the school: Share a copy of the asthma action plan with your child’s school, including the school nurse, teachers, and other staff members. Schedule a meeting to discuss the plan and answer any questions they may have. It’s important to ensure that everyone involved in your child’s care is aware of the plan and knows how to respond in case of an emergency.
-
Train school staff: Provide training to the school staff on how to administer the prescribed medications, such as using inhalers or spacers. Make sure they understand the correct techniques and dosage instructions. It’s also important to educate them about recognizing asthma symptoms and early warning signs.
-
Medication storage: Ensure that the school has a designated and secure location for storing your child’s medications. The storage area should be easily accessible and away from direct sunlight or extreme temperatures. Clearly label the medications with your child’s name and any specific instructions.
-
Regular asthma reviews: Schedule regular check-ins with your child’s healthcare provider to assess their asthma control and make any necessary adjustments to the asthma action plan. Share any updates or changes with the school so they can update their records accordingly.
-
Discuss physical activities: Communicate with the school about your child’s participation in physical education classes or sports activities. Provide any necessary instructions or modifications to ensure your child’s safety during exercise.
By implementing the asthma action plan effectively, you can help ensure that your child’s asthma is well-managed at school and that they have the necessary support and resources to thrive academically and socially. Regular communication and collaboration with the school and healthcare providers are key to successful asthma management.
Air Purifiers
Types of Air Purifiers
Air purifiers can be a valuable addition to classrooms and other school environments to help improve indoor air quality and reduce asthma triggers. There are several types of air purifiers available, each with its own mechanisms for filtering and purifying the air. Here are some common types of air purifiers:
-
HEPA (High-Efficiency Particulate Air) Filters: HEPA filters are highly effective in removing fine particles from the air, including allergens like pollen, dust mites, pet dander, and mold spores. They can capture particles as small as 0.3 microns and have a high filtration efficiency of 99.97%. HEPA filters are recommended for individuals with allergies or asthma.
-
Activated Carbon Filters: Activated carbon filters are designed to remove odors, chemicals, and gases from the air. They contain a specially treated carbon material that absorbs and traps these pollutants, reducing their presence in the indoor air. Activated carbon filters are particularly useful in environments where there may be strong odors or chemical fumes.
-
UV-C Light Purifiers: UV-C light purifiers use ultraviolet (UV) light to kill or inactivate bacteria, viruses, and other microorganisms present in the air. These purifiers are effective in reducing the spread of airborne pathogens and can be used in conjunction with other types of filters to provide comprehensive air purification.
-
Ionic Air Purifiers: Ionic air purifiers release negative ions into the air, which attach to airborne particles, causing them to become heavy and fall to the ground. These purifiers can effectively reduce particulate matter in the air, but they do not remove gases or odors. It’s important to note that some individuals may be sensitive to the ozone produced by certain types of ionic air purifiers.
When choosing an air purifier for school, consider the specific needs and requirements of the environment. HEPA filters are generally recommended as they are effective in capturing allergens and other airborne particles. However, it’s important to assess the overall air quality and identify any specific concerns or triggers that need to be addressed. Consulting with an indoor air quality expert or a healthcare provider can be helpful in making an informed decision.
Choosing an Air Purifier for School
When selecting an air purifier for your child’s school, there are several factors to consider to ensure that it meets the specific needs of the environment. Here are some essential considerations when choosing an air purifier for school:
-
Filtration Efficiency: Look for an air purifier with a HEPA (High-Efficiency Particulate Air) filter. HEPA filters are designed to capture particles as small as 0.3 microns, including allergens like pollen, dust mites, and pet dander. Ensure that the air purifier has a filtration efficiency of 99.97% or higher.
-
Air Purification Rate: Consider the size of the room or area where the air purifier will be used. Look for an air purifier that can effectively clean the air in the given space. The manufacturer usually provides the recommended room size for each purifier model.
-
Noise Level: Check the noise level of the air purifier, especially if it will be used in a classroom or other quiet environments. Look for models with a low noise level, typically measured in decibels (dB). Some air purifiers have a “quiet” or “sleep” mode for minimal noise output.
-
Energy Efficiency: Consider the energy consumption of the air purifier. Look for models with an Energy Star certification, as they meet strict energy efficiency guidelines. Energy-efficient models can help reduce electricity costs and have a smaller environmental impact.
-
Maintenance and Filter Replacement: Understand the maintenance requirements of the air purifier, including how often the filters need to be replaced and the cost of replacement filters. Some air purifiers have filter replacement indicators or timers to remind you when it’s time to change the filters.
-
Additional Features: Consider any additional features that may be beneficial for the school environment. This can include features like a timer function, air quality sensors, remote control, or a child lock to prevent tampering.
Once you have selected an air purifier, it’s important to properly install and position it in the school environment. Follow the manufacturer’s instructions for installation, and place the air purifier in a location that allows for optimal air circulation and purification. Regularly clean and maintain the air purifier according to the manufacturer’s guidelines to ensure its effective operation.
Maintaining and Cleaning Air Purifiers
Proper maintenance and cleaning of air purifiers are essential to ensure their optimal performance and longevity. Here are some important guidelines for maintaining and cleaning air purifiers:
-
Regular Filter Replacement: Follow the manufacturer’s recommendations for filter replacement. Most air purifiers have different types of filters that need to be replaced at different intervals. Common types of filters include pre-filters, activated carbon filters, and HEPA filters. Regular replacement of filters ensures that the air purifier continues to effectively remove airborne particles and allergens.
-
Cleaning the Exterior: Clean the exterior of the air purifier regularly to remove dust, dirt, and other debris. Use a soft, damp cloth to wipe down the surface of the purifier. Avoid using abrasive cleaners or harsh chemicals that may damage the purifier.
-
Cleaning the Pre-Filter: Pre-filters are designed to capture larger particles like dust and pet hair, preventing them from clogging the main filters. Clean the pre-filter regularly by removing it from the air purifier and rinsing it under running water. Allow the pre-filter to dry completely before reinstalling it.
-
Vacuuming the Grill: Over time, the grill or vents of the air purifier may accumulate dust and debris. Use a vacuum cleaner with a brush attachment to gently remove any buildup from the grill. This will help maintain proper airflow and prevent the purifier from overheating.
-
Cleaning the Sensor: If your air purifier has an air quality sensor, clean the sensor regularly to ensure accurate readings. Follow the manufacturer’s instructions for cleaning the sensor. In most cases, a soft, dry cloth or a cotton swab can be used to wipe the sensor gently.
-
Regular Inspection: Periodically inspect the air purifier for any signs of damage or malfunction. Check the power cord, plugs, and control buttons for any issues. If you notice any problems or if the air purifier is not operating effectively, contact the manufacturer or a qualified technician for assistance.
By following these maintenance and cleaning guidelines, you can ensure that the air purifier continues to provide clean and purified air in the school environment. Regular maintenance also helps prolong the life of the air purifier, saving costs on replacement parts or a new unit.
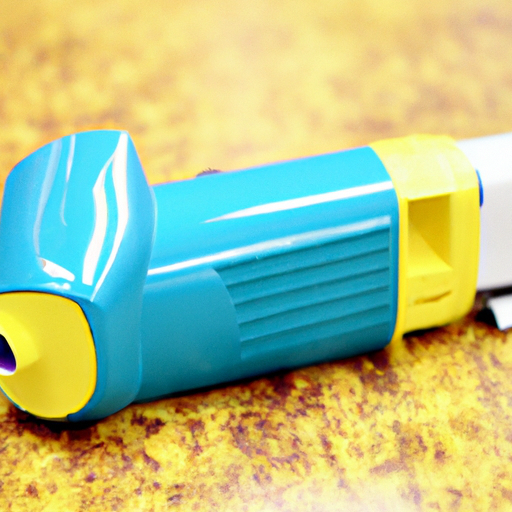
Emergency Inhaler
Importance of Having an Emergency Inhaler
An emergency inhaler, also known as a rescue or fast-acting inhaler, is a crucial tool for individuals with asthma, including students at school. It contains medication (usually a short-acting bronchodilator like albuterol) that provides quick relief during an asthma attack or when symptoms worsen. Here are some key reasons why having an emergency inhaler at school is important:
-
Immediate Relief: During an asthma attack, time is of the essence. Having an emergency inhaler readily available allows the student to quickly and effectively manage their symptoms, preventing further distress and potential complications. The medication in the inhaler relaxes the airway muscles, reducing constriction and easing breathing difficulties.
-
Managing Worsening Symptoms: Even outside of a full-blown asthma attack, symptoms can worsen unexpectedly. With an emergency inhaler on hand, students can promptly address worsening symptoms, such as coughing, wheezing, shortness of breath, or chest tightness. Quick intervention can help prevent a mild episode from escalating into a severe asthma attack.
-
Safety and Peace of Mind: For students with asthma, having an emergency inhaler at school provides a sense of security and reassurance. Knowing that they have immediate access to medication in case of an emergency can alleviate anxiety and promote peace of mind. This allows students to fully engage in academic and extracurricular activities without the constant worry of an asthma flare-up.
-
Empowering Independence: Having an emergency inhaler enables students to take control of their asthma and become proactive in managing their symptoms. It encourages responsibility and self-awareness, empowering students to recognize their early warning signs and take appropriate action. By promoting independence, students develop valuable skills in self-care and self-advocacy.
-
Preventing Absences and Disruptions: When asthma symptoms are effectively managed, students are less likely to miss school due to asthma-related issues. By having an emergency inhaler readily available, students can address symptoms promptly, reducing the need for absences or disruptions in their education. It allows them to participate fully in classroom activities, sports, and other school events.
Ensuring Accessibility of Emergency Inhaler
To ensure the accessibility of an emergency inhaler at school, it is important to take certain steps and establish protocols. Here are some key measures to ensure that students have easy access to their emergency inhalers:
-
Provide a Spare Inhaler: It is recommended to provide a spare emergency inhaler to the school or the school nurse. This ensures that even if the student forgets or misplaces their personal inhaler, there is always a backup available on-site. The spare inhaler should be clearly labeled with the student’s name and proper dosage instructions.
-
Communicate with the School: Inform the school, including the school nurse, teachers, and administrators, about your child’s asthma and the need for an emergency inhaler. Schedule a meeting to discuss your child’s specific requirements and devise a plan for managing their asthma effectively. Share any necessary medical forms or documentation with the school.
-
Develop an Individualized Health Care Plan (IHCP): Work with the school nurse or healthcare provider to develop an Individualized Health Care Plan (IHCP) for your child. The IHCP outlines the specific actions and accommodations needed to support your child’s asthma management at school. It should clearly state that the student requires access to their emergency inhaler at all times and specify the steps to be taken in case of an emergency.
-
Proper Storage and Accessibility: Ensure that the emergency inhaler is stored in a safe and easily accessible location. Discuss the storage arrangements with the school nurse or designated staff member to identify the most appropriate place. It should be easily reachable in case of an emergency, but also secure to prevent unauthorized access or tampering.
-
Empower the Student: Educate and empower the student to advocate for themselves and request their emergency inhaler whenever needed. Teach them how to use the inhaler correctly and explain the importance of promptly alerting a teacher or adult if they experience worsening asthma symptoms. Encourage open communication and reinforce their ability to take control of their asthma management.
-
Regular Check-Ins: Schedule regular check-ins with the school nurse or healthcare provider to assess your child’s asthma control and update any necessary information. This helps ensure that the emergency inhaler and asthma management plan remain up to date. Share any changes to the emergency contact information or healthcare providers with the school.
By implementing these measures, you can help ensure that your child’s emergency inhaler is readily accessible at school, allowing them to effectively manage their asthma and respond to any potential asthma emergencies. Regular communication and collaboration with the school are crucial to maintaining a safe and supportive environment for students with asthma.